[tatsu_section padding= “90px 0% 90px 0%”][tatsu_row column_spacing= “” row_id= “” row_class= “” equal_height_columns= “1” full_width= “0” gutter= “no” layout= “1/2+1/2”][tatsu_column layout= “1/2”][tatsu_text max_width= “” wrap_alignment= “center” animation_type= “fadeIn”]
Tips for the Easy Peasy Artist
Tips & tricks on how to use those funny feeling, smudgy ‘crayons’.
[sc name=”Brushes” color=”orange” content=”Oil Pastels Are NOT Crayons:” ]
The first thing to remember is that oil pastels are not crayons. They are very different in what they are made of and how they are used. Oil pastels use oil and wax to hold them together. This creates the soft, creamy texture of an oil pastel and enables them to be coloured and blended. Crayons use wax to hold them together which makes them much harder and a little more difficult to use.
[sc name=”Brushes” color=”blue” content=”Tips on setting up:” ]
- Use sheets of newspaper or a table cover to protect your desk.
- Also use the newspaper to ‘clean’ the oil pastels. Oil pastels can sometimes become smudged with other colours.
- Spray finished works with fixative or hairspray to prevent smudging.
- Try using vegetable dye or a paint wash over the top of an oil pastel artwork to complete the background. It is quicker and uses less oil pastel. It’s also great to use to fill in the spaces.
[sc name=”Brushes” color=”green” content=”What Skills and Knowledge Do You Need?:” ]
You need to practise these skills if you are going to be great at using oil pastels.
How to hold an oil pastel:
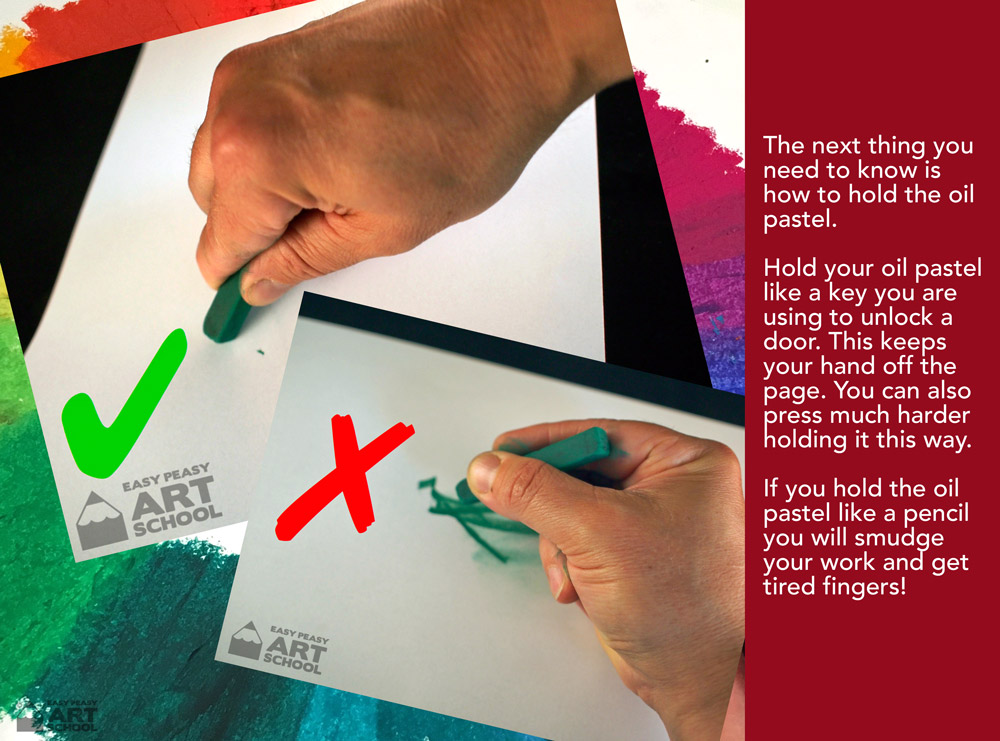
One of the downsides of oil pastels is that they can be smudged very easily, especially if you hold them like a pencil.
To stop smudging your work practise these skills:
- Hold the oil pastel like a knife which you are using to cut up your food.
- Hold the oil pastel like you would a key when unlocking a door.
- Or simply, place your thumb on one side and the remainder of your fingers on the other side.
Know your colours:
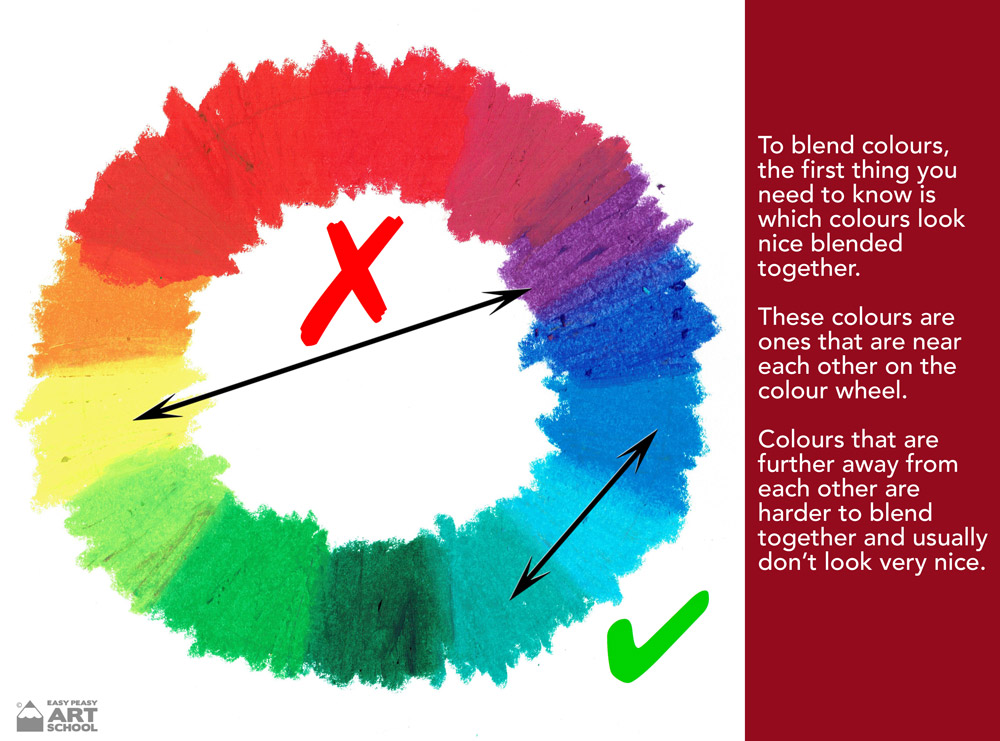
You need to know which oil pastel colours can be blended together.
Colours that can be blended together are colours that are nearby on the colour wheel. Colours that are opposite each other or a long way apart on the colour wheel are very difficult to blend and make look nice.
Examples of colours that can be blended:
- Dark Blue, Light Blue, White
- Purple, Dark Blue, Light Blue
- Dark Green, Light Green, Yellow
- Red, Orange, Yellow
- Brown, Red, Orange
- Brown, Orange, Flesh Tone
- Brown, Flesh tone
Learn how to colour with oil pastels:
We don’t actually ‘colour in’ with oil pastel. By colouring, as you would with pencils or crayons, your work would be scratchy with lots of spaces. When colouring with oil pastels, the best way would be to think of it as ‘squashing the oil pastel onto the page’.
Some things to remember:
- Press firmly. Make sure that the correct grip is used to prevent smudging.
- Use short strokes, overlapping as you go so as to avoid white spaces.
- If you use long, fast strokes you introduce lots of empty white spaces in your colouring.
- Avoid using black until last as it is more obvious when smudged.
- If your oil pastels are dirty with other colours, clean them first on newspaper or a piece of scrap paper.
Blending:
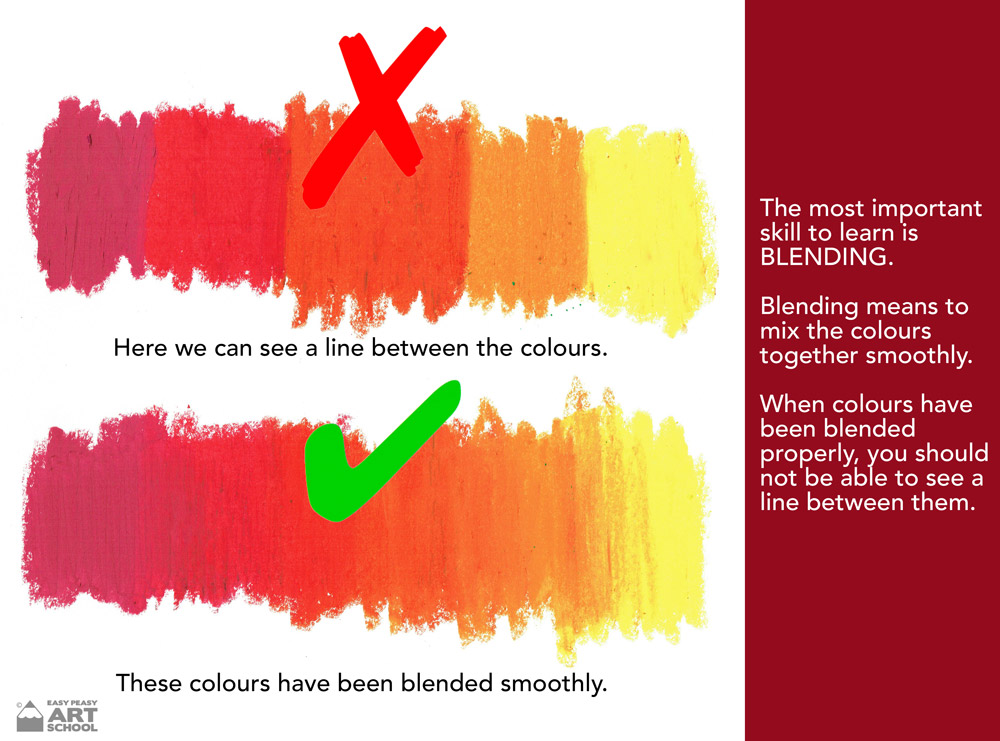
One of the best things about oil pastels is how we can blend them which means mixing colours together.
Some things to remember:
- Choose colours from the same family, colours that are close together on the colour wheel.
- Always start with the darker colour.
- Using short firm strokes, press firmly to begin with but as you move away gradually press lighter and lighter until your colouring becomes a little messy or scratchy or shaded. We do this so we don’t have a line between two colours when we blend them.
- Using the lighter colour, colour over the ‘messy’ colouring by overlapping. ALWAYS BLEND WITH THE LIGHTER COLOUR. This seems to work better than using the darker of the two.
- These steps can be repeated using more colours if you like.
- White can be added at the end as a highlight. Simply blend over the top of a light area using white oil pastel.
- Black can also be used when finished to create shadow. Shade in the desired area with black and then blend it back in with the original colour.
Outlining:
The final skill you need to know before you can become an oil pastel expert is outlining. A simple black outline can turn your artwork into something dramatic and eye-catching. It adds contrast and emphasises the vibrant colour of the oil pastels.
Some things to remember:
- Black seems to work best when outlining.
- Always leave outlining until last as the black will stand out when smudged and may wreck your work.
- Practise drawing lines on scrap first. See if you can draw lines of various thicknesses.
- Aim to outline using a single dark line rather than colouring the outline. This can sometime make an ugly, thick, messy line.
- When outlining, press ‘really hard’.
- Turn the oil pastel every so often to stop the line from getting thicker.
[sc name=”Brushes” color=”purple” content=”Expert Techniques:” ]
If you master the basics and find that you are looking for new ways to use your oil pastels you could always try some of these other techniques.
Sgraffito:
Sgraffito means to scratch back layers. In an oil pastel artwork this means that you can use a sharp object to scratch back layers of colour to reveal other colours underneath. You can also use sgraffito to scratch in details such as lines, patterns or textures or highlights.
Objects to use for sgraffito include:
- Bamboo food skewers – (please be careful with safety here!)
- Toothpicks
- Paddle Pop sticks.
Rubbing back:
Use a soft eraser to rub out areas of coloured oil pastel to create highlights in your artwork.
Painting over with oil:
An interesting technique to try is to once an oil pastel artwork has been coloured, paint over it using vegetable or baby oil. This dissolves the oil pastel and turns it into a painting. Just reminder that it amy take a while to dry so you will need an area for drying.
Now that you are an expert with oil pastels, get creating and have fun with this amazing medium!
[sc name=”Brushes” color=”green” content=”Would you like to know more?:” ]
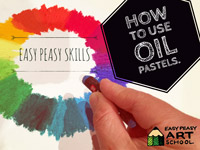
Check out our lesson “How to use oil pastels” for step by step instructions on how to use oil pastels.
Click on the photo to find out more!
 [/tatsu_text][/tatsu_column][tatsu_column layout= “1/2”][grids column= “1” border_color= “”][grid_content icon= “” icon_size= “medium” icon_color= “#95d600” animation_type= “fadeIn”]
 [/grid_content][/grids][/tatsu_column][/tatsu_row][/tatsu_section]

