Free Lesson – Watermelon
Beginner Level
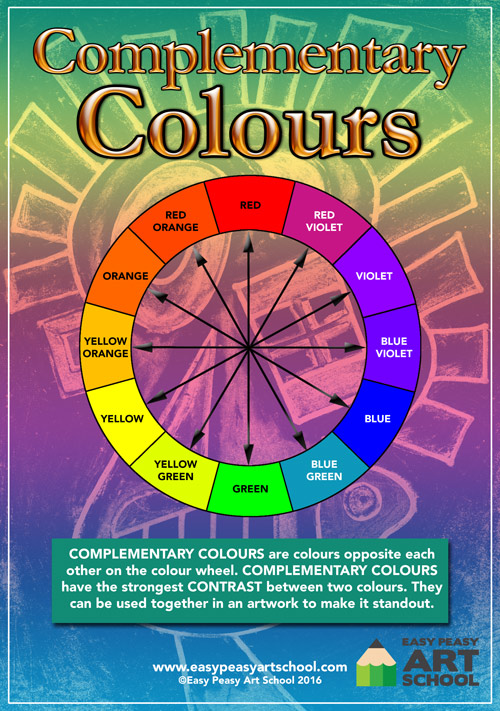
This is a great activity to practise your soft pastel or chalk pastel skills. It uses complementary colours which really makes an artwork stand out.
Complementary colours are opposite each other on the colour wheel. They include red & green and blue & orange.
Materials
- Soft pastels
- Table cover or newspaper to protect your work area.
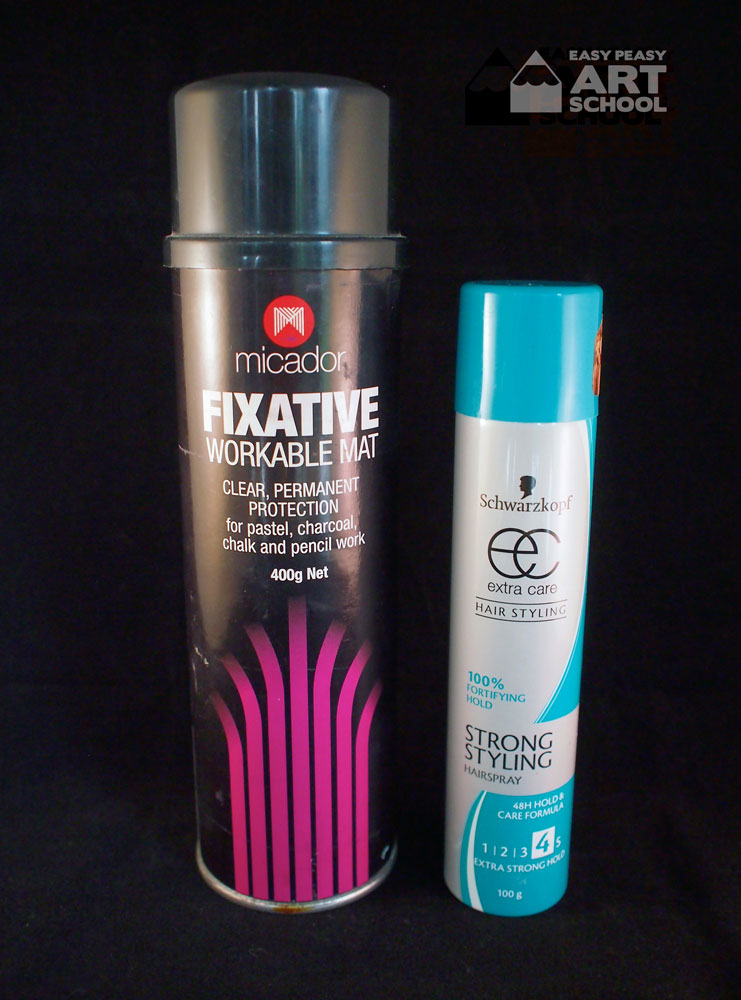
- Hairspray or fixative to spray your artwork to prevent smudging.

Easy Peasy Tips:
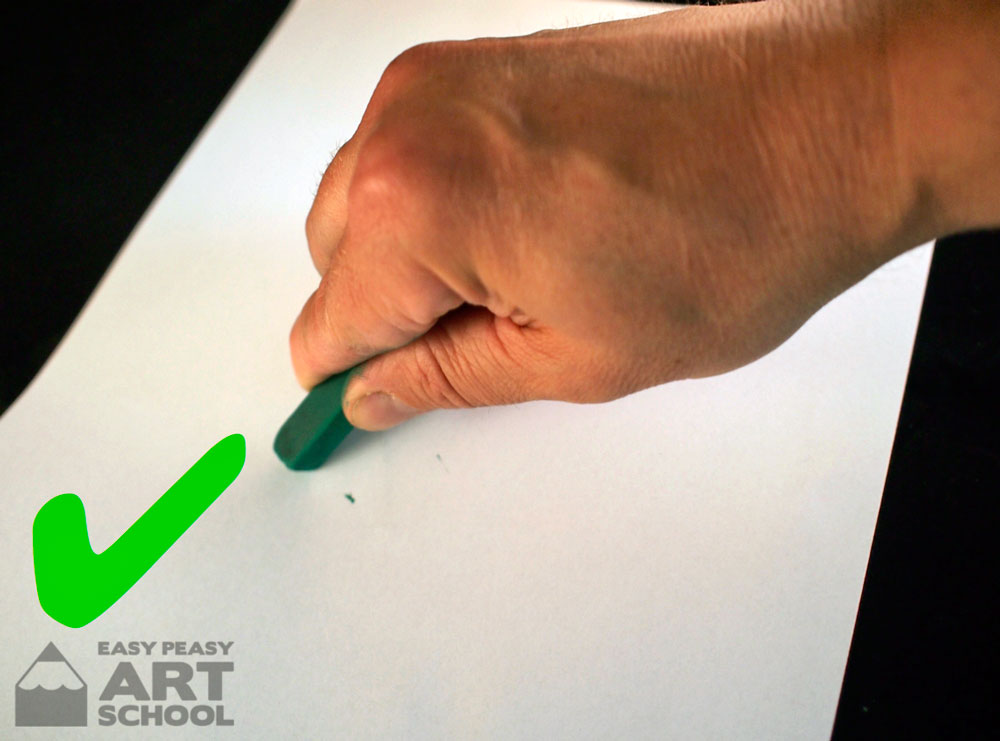
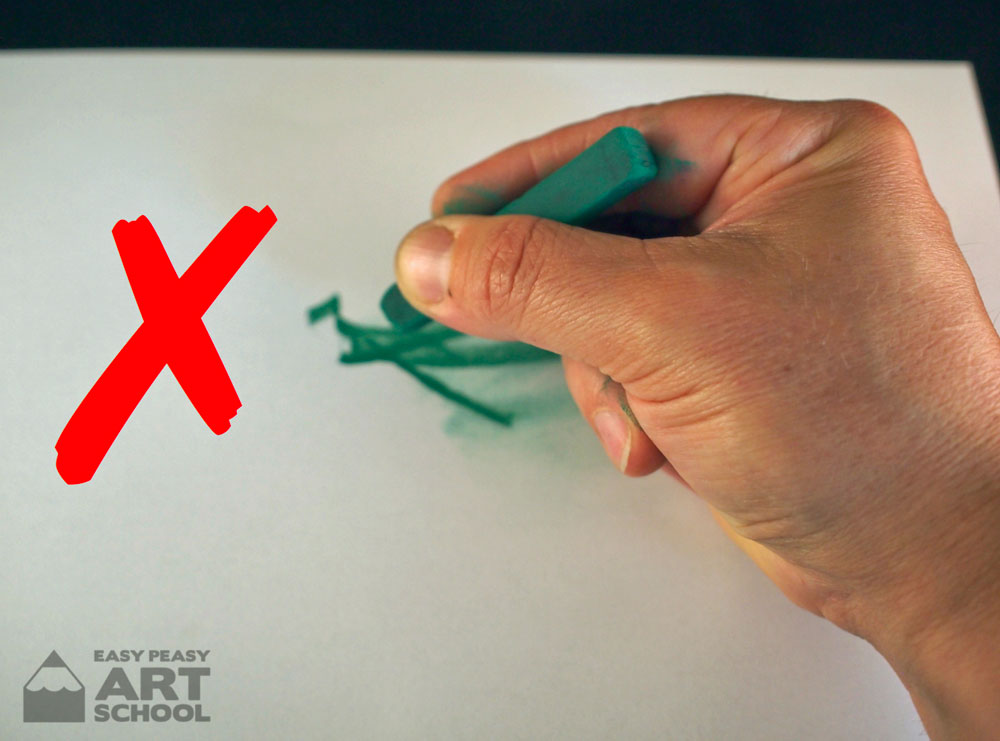
- Don’t forget to use a key grip when holding the soft pastel. If you hold them like a pencil you will smudge your work.
- As you draw lines with pastels, remember to turn them every so often to keep a thin line.
- You could also try this artwork using other mediums such as oil pastels or paint.
- Blending / Smudging: Remember to use more or less fingers depending on the size of the object or to use your pinkie finger for small spaces. It’s also a good idea to wipe your fingers on a cloth between unlike colours to prevent colour mixing.
For The Teacher:
- Show the class a colour wheel. Talk about the names of colours and talk about the class’ favourite colours. Discuss how some colours look nice together whilst others don’t. Introduce complementary colours and show how they are colours opposite on the colour wheel.
Steps
Place your paper in landscape style
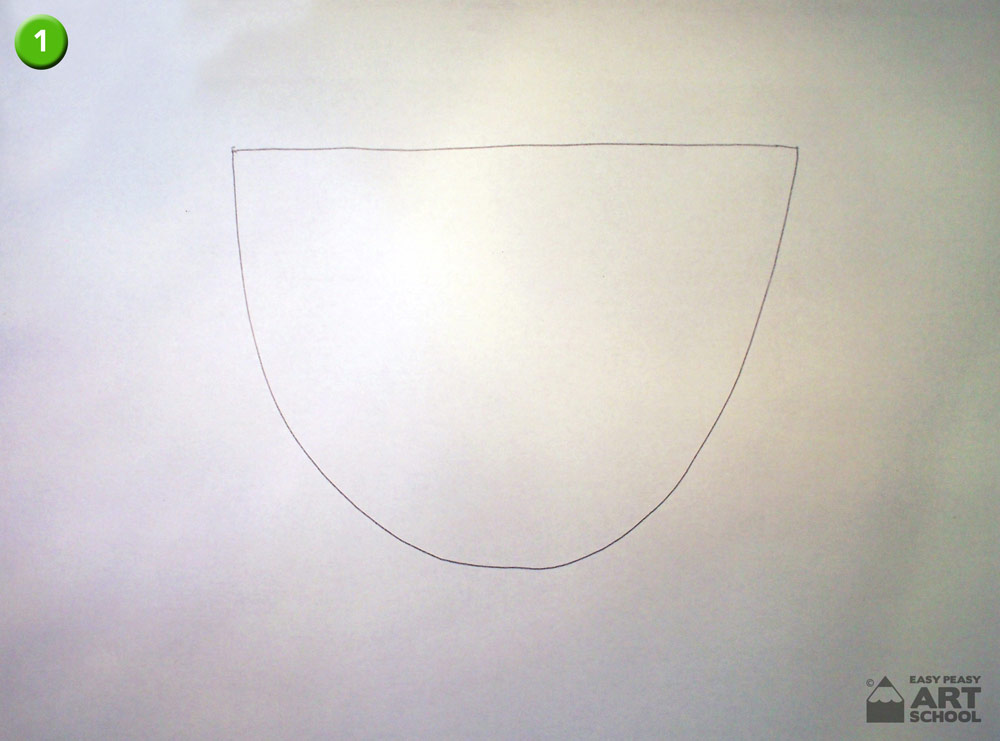
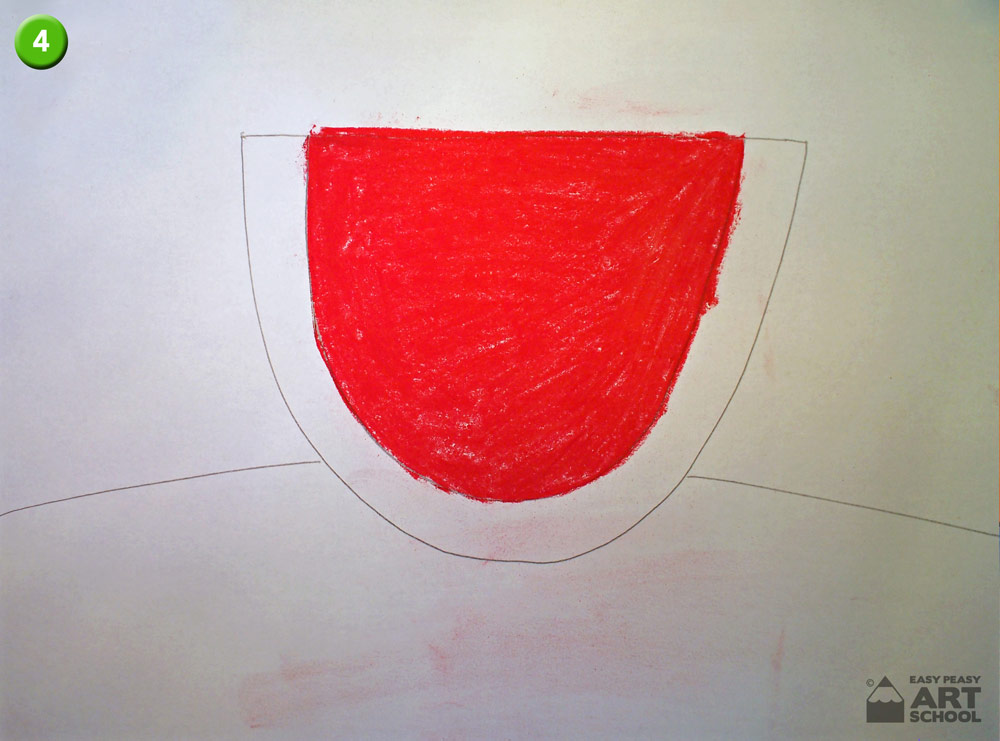
- Drawing: Towards the top of your page, using a pencil, draw a straight line leaving an equal space on each end. Now draw a large semi-circle or smile shaped line underneath joining the top line.
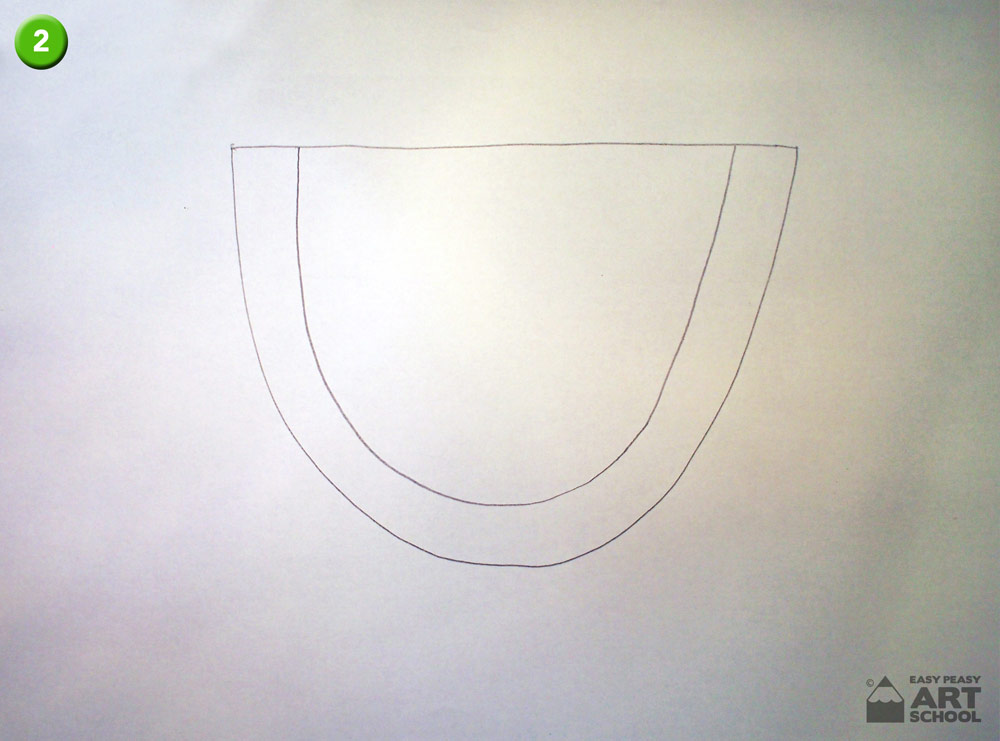
- To draw the skin, draw another smile shaped line about 2 finger spaces in from the first. Try and keep it the same distance apart all the way around.
- To draw the plate, draw a curved line from the edge of the page up towards the watermelon. Imagine it goes behind and out the other side before drawing it back down to the side of the page.
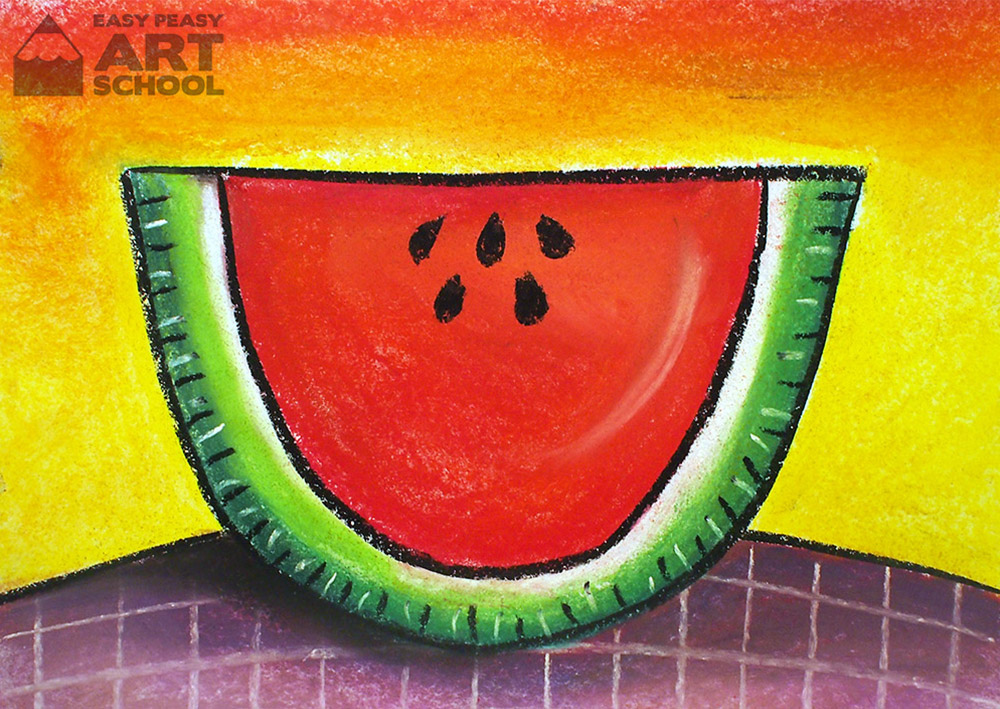
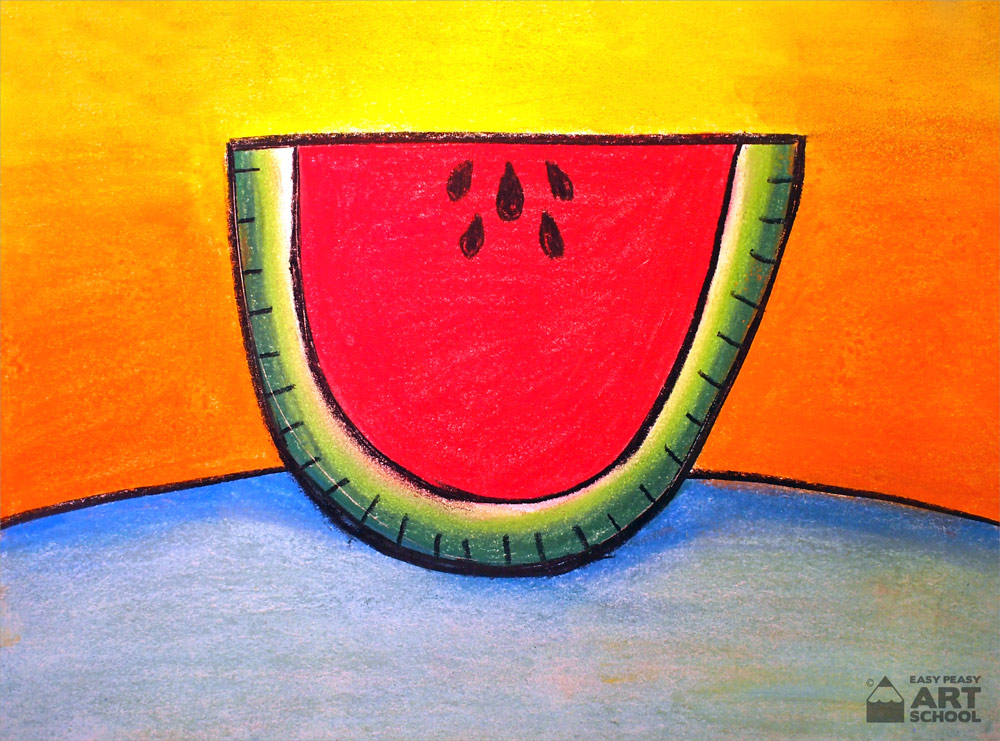
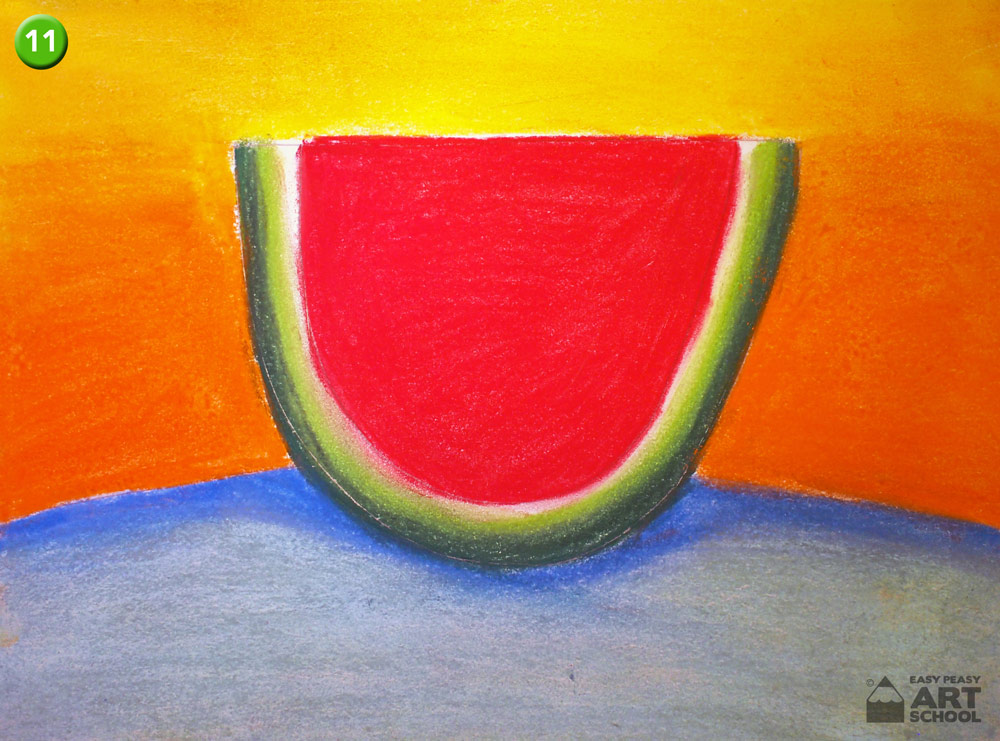
- Colouring: Begin with the red, trace the inside shape with the red pastel and then colour using short firm strokes. Try not to leave too many spaces as the colours won’t be bright.
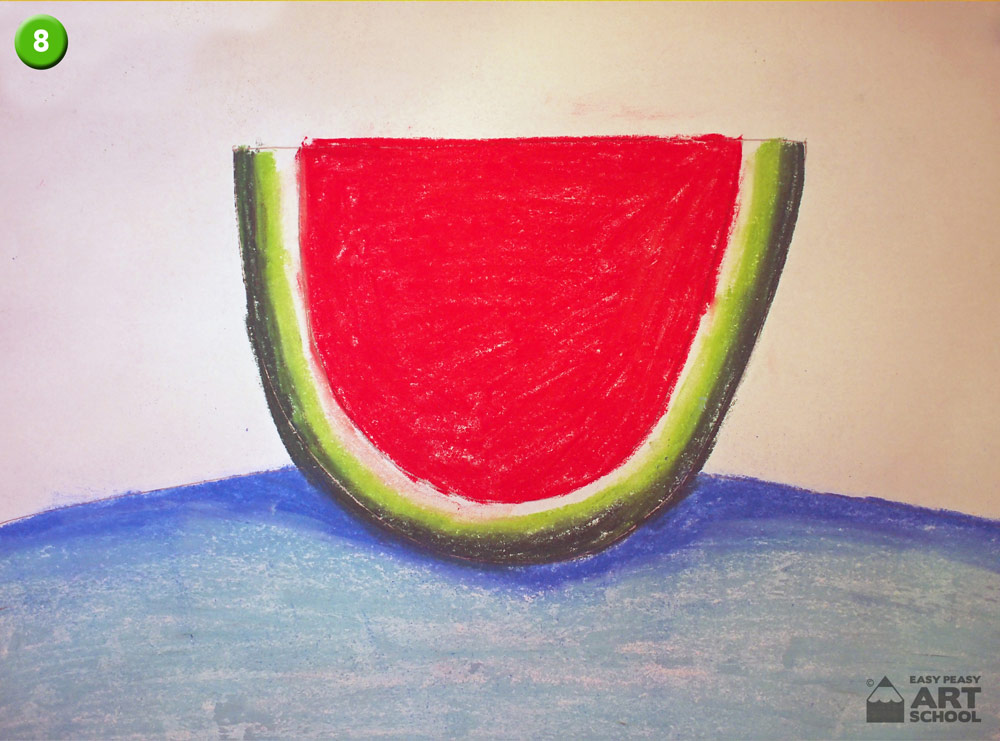
- Using dark green trace the outside of the skin and then colour in short strokes to make this line thicker. (Try to fill in about 1/3 of the width of the skin.)
- Now colour with the light green. Try and overlap the two colours to help blend them together. Once again, aim for about 1/3 of the skin. Leave the last 1/3 white or you could colour it white if you choose.
- To colour the plate, trace with dark blue before colouring side to side to make this line thicker. Add a little shadow on each side and underneath the watermelon.
- Now colour the rest of the plate in light blue.
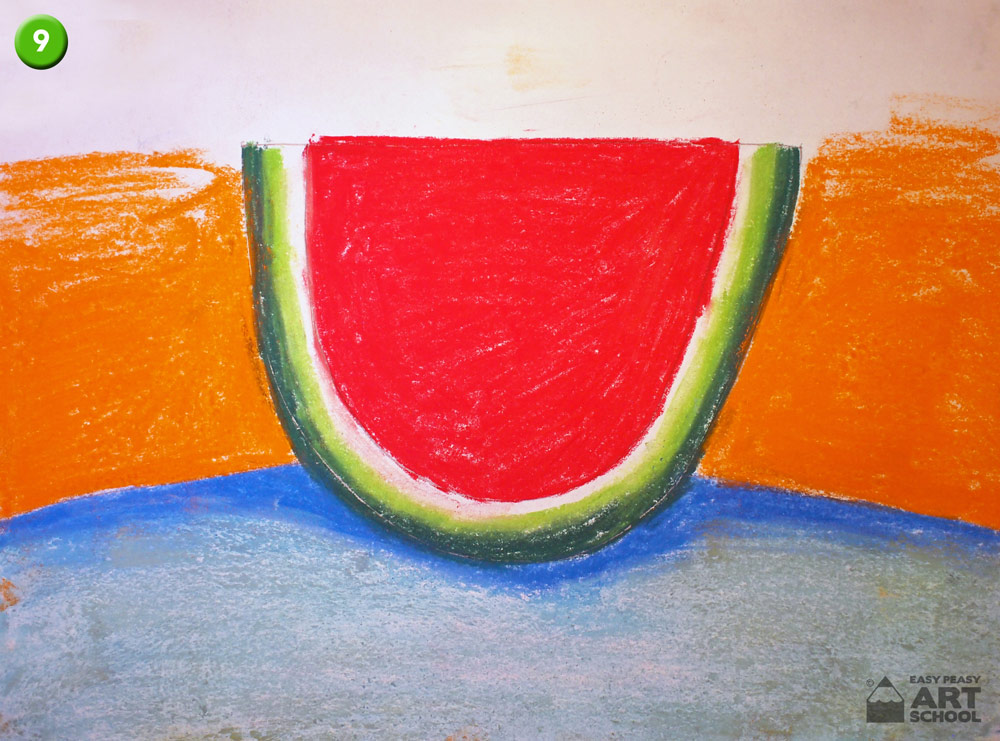
- Above the plate, colour using orange.
- Swap to yellow and colour the rest of the background.
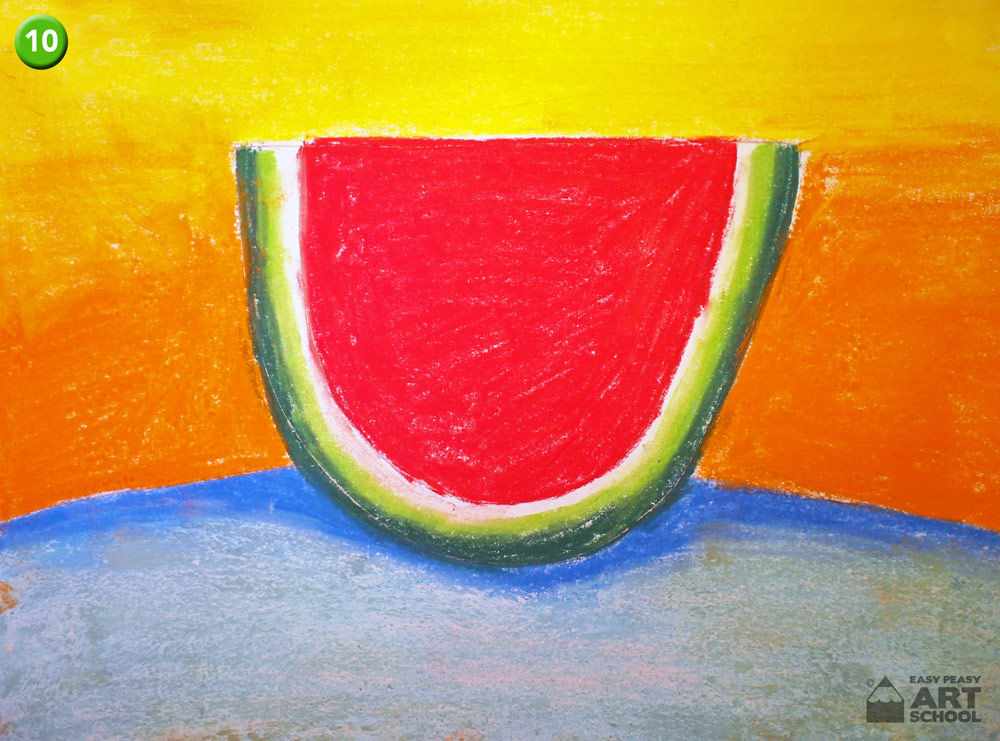
- Smudging: Trace around each shape with a finger before smudging in short firm strokes. It’s a good idea to smudge in the direction of the shape. So for example, the plate and background side to side and the skin in a semi-circular direction.
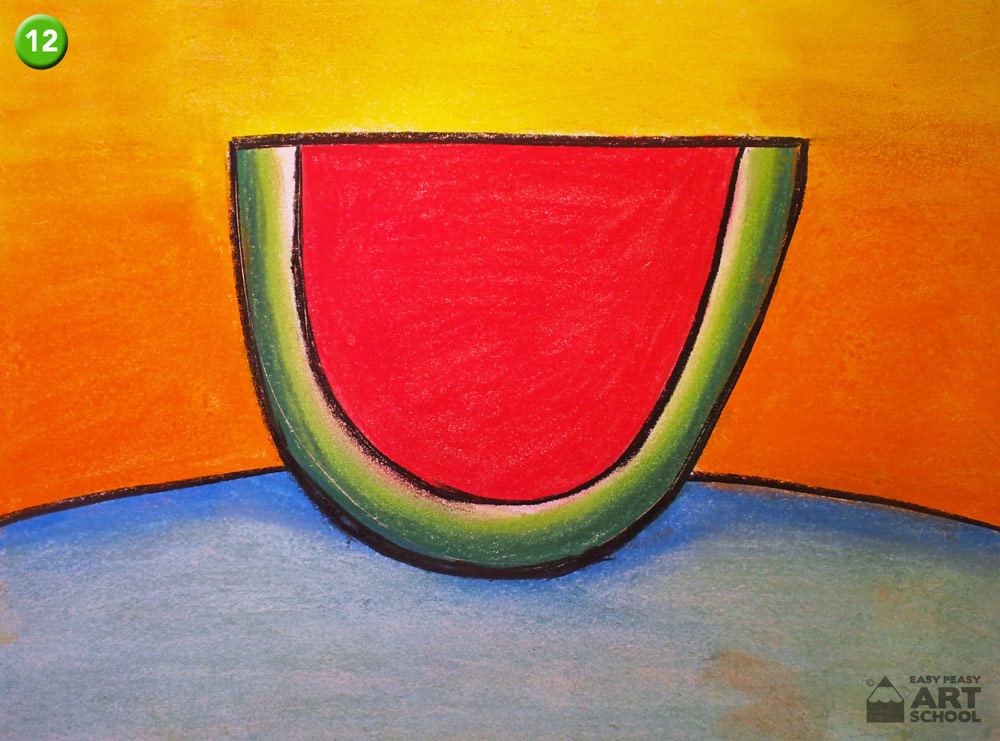
- Adding Detail: Carefully trace each of the pencil lines in black pastel.
- Remember to turn your pastel every now and then to keep the line thin.
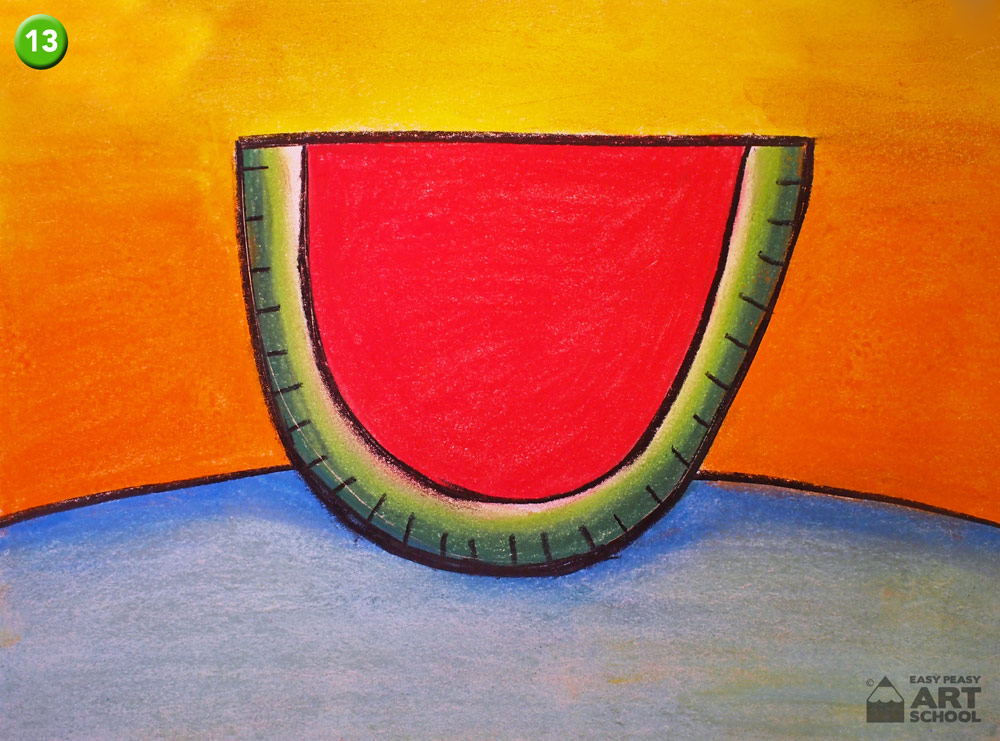
- Add some short dashes on the inside of the skin; this adds interest to the picture.
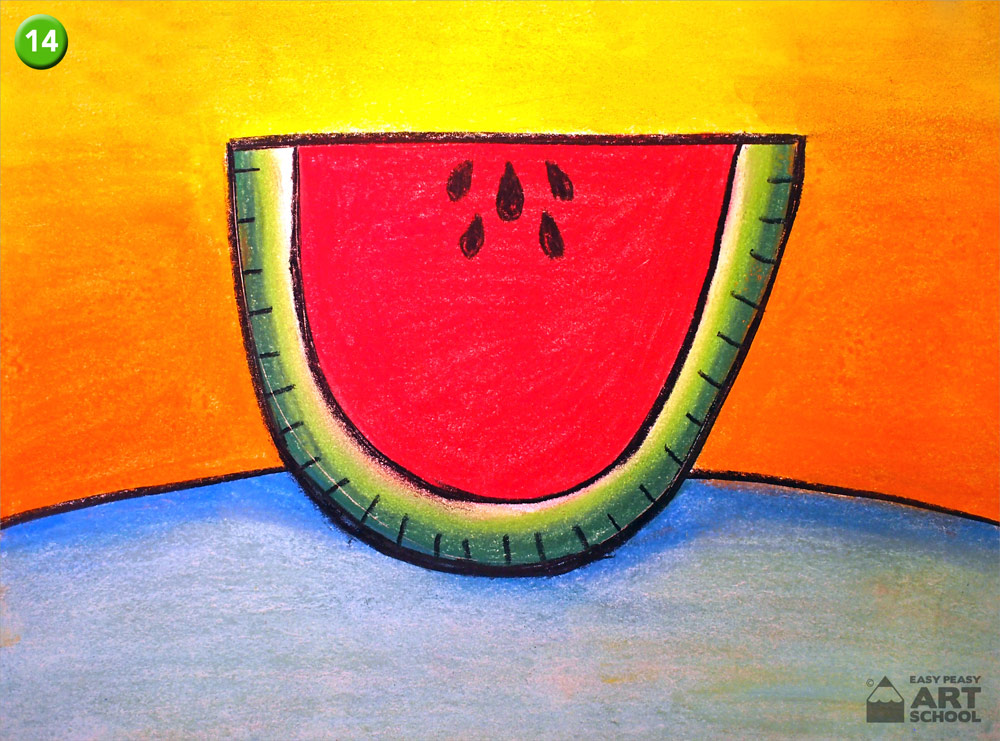
- Finally add some seeds. Odd numbers always look best in an artwork so 5 should work nicely. Try and draw them as water drop shapes. Starting in the middle. 3 on the top and 2 underneath.
Your artwork is now complete. Spray your work with fixative or hairspray to stop your work from smudging.
Other ideas:
- Try using other combinations of complementary colours in the background. For example, you could use yellow and purple together.
- Try adding some extra detail to your artwork such as patterns or textures to create more interest.