NEW: Painted Poppies
Beginner / Intermediate Level
In this artwork we create a simple yet beautiful artwork that symbolises those who fought and died in war. Poppies are used as a symbol of remembrance on both ANZAC day and Remembrance Day. Remembrance day is commemorated each year on the 11th November as this is the day that World War 1 ended. The poppies have come to symbolise these two days as they grew wild on the battlefields.
In this artwork we use paint to create colourful representations of these important symbols. We also learn about using different shades of paint to makes shapes and spaces stand out.
Materials
- White paper
- Black markers
- Paint brushes: you may need some smaller brushes for smaller spaces.
- Poster or acrylic paint
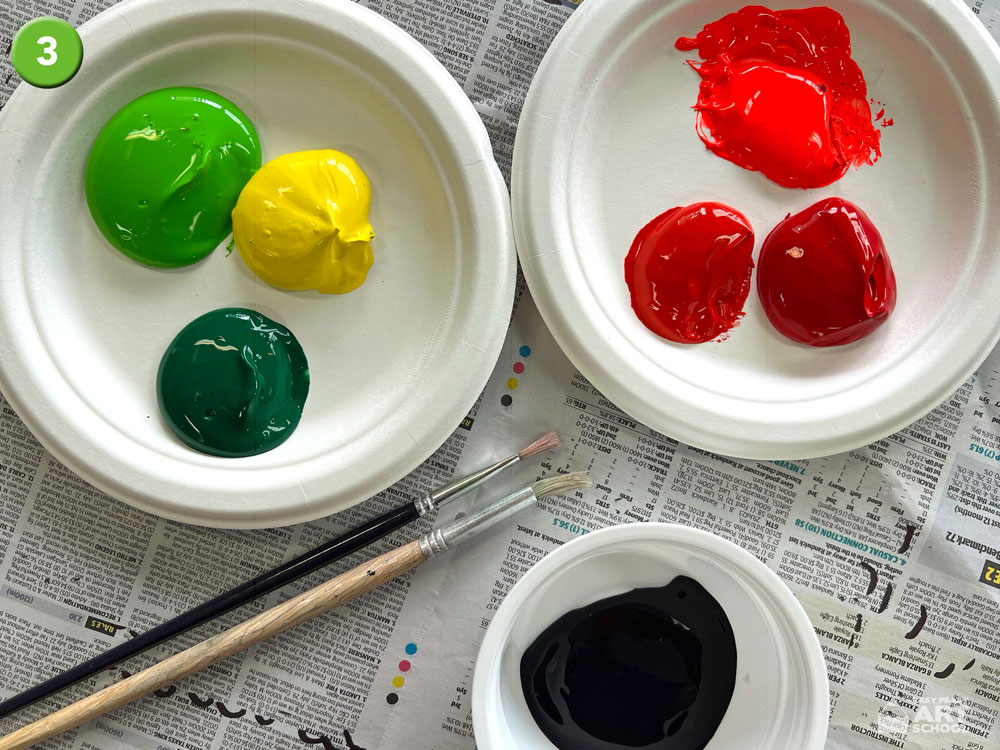
- 3 shades of red. For example: fluorescent red, warm red and cool red
- Dark green, light green and yellow
- Black
- Paint Palettes
- Water containers
- Newspaper or table covers to protect workspace
- Paint shirts or aprons

Easy Peasy Tips:
- For this lesson you will need three different shades or tints of red. If you don’t have these colours in bottles or tubes you could try mixing your own. To make the lighter red, try mixing in small amounts of yellow or white. To make a darker red, try adding a very small amount of black.
For The Teacher:
- As an introduction to the lesson, students should learn the importance of why poppies are used as a symbol of remembrance on ANZAC Day or Remembrance Day.
- This lesson is not about creating realistic depictions of poppies but rather a colourful, almost abstract version of the flowers. The emphasis on this lesson should be on filling the space and the use of colour to help define the individual flowers.
Steps
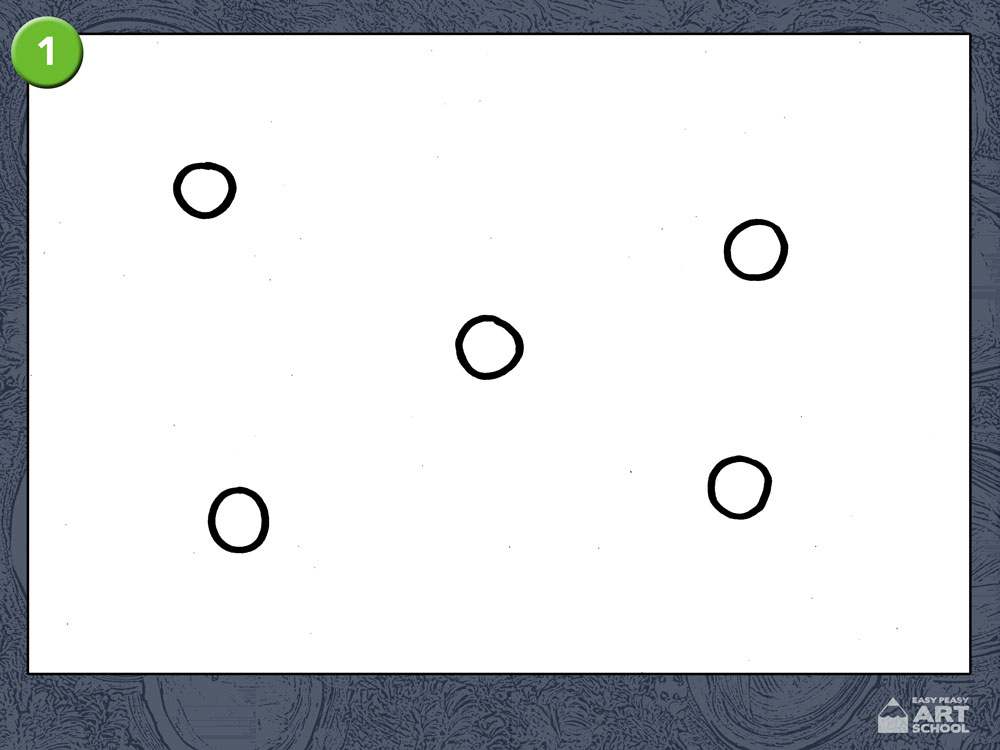
Place your paper landscape style
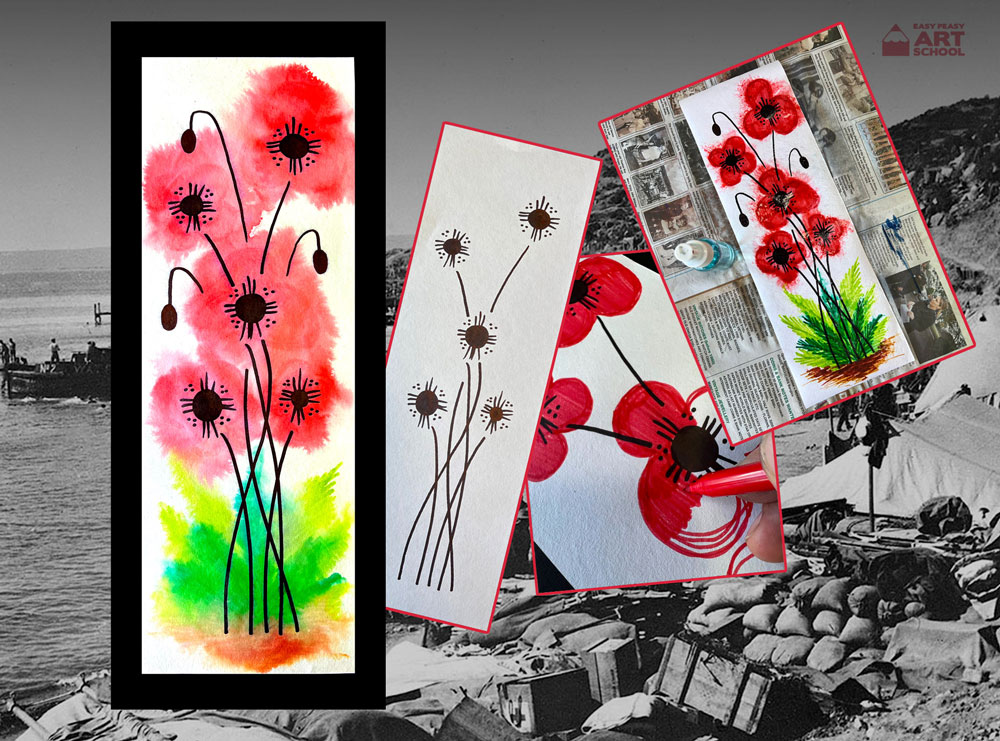
- Drawing: Using your black marker, draw five circles on your page as shown. These circles are approximately the size of a large coin. Think of the number five on a dice and how the dots are arranged as a guide of where to place them.
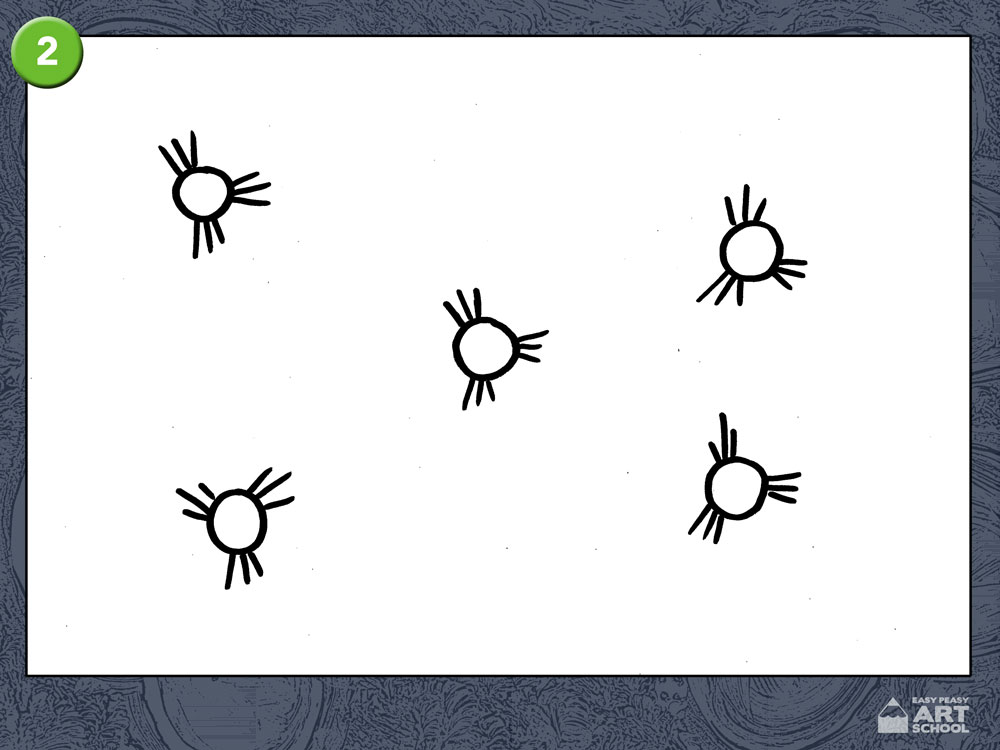
- From these circles, draw three groups of three short, thin lines as shown.
- Painting: To paint our poppies we will begin by making sure that we have the colours and equipment we need. Dont forget to also organise a water contatiner to rinse your brush.
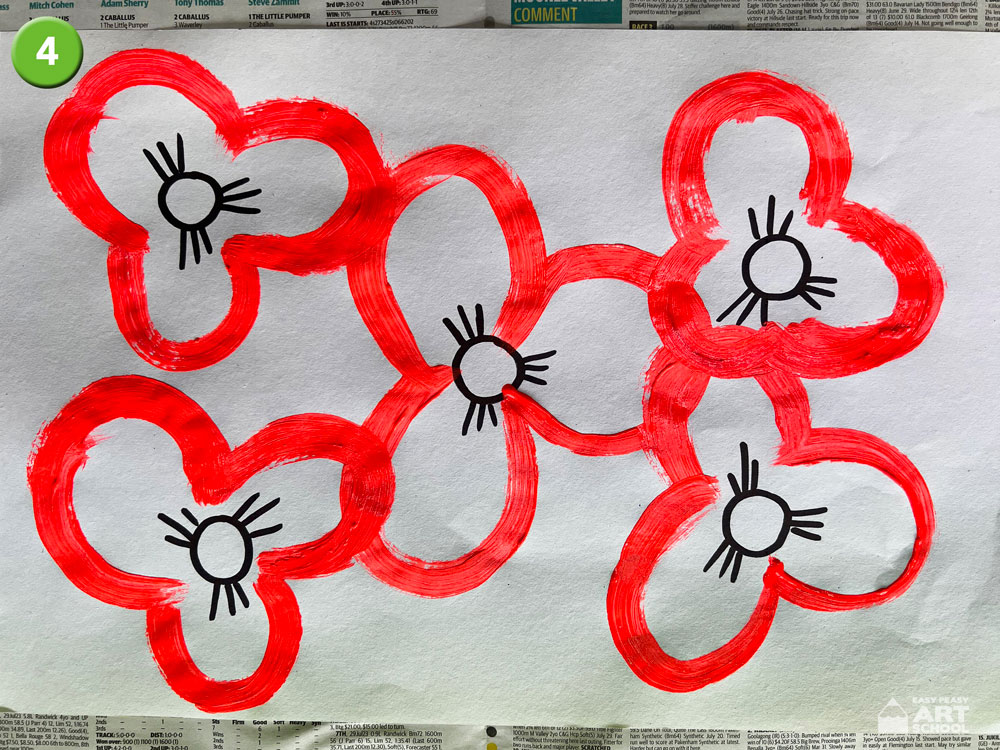
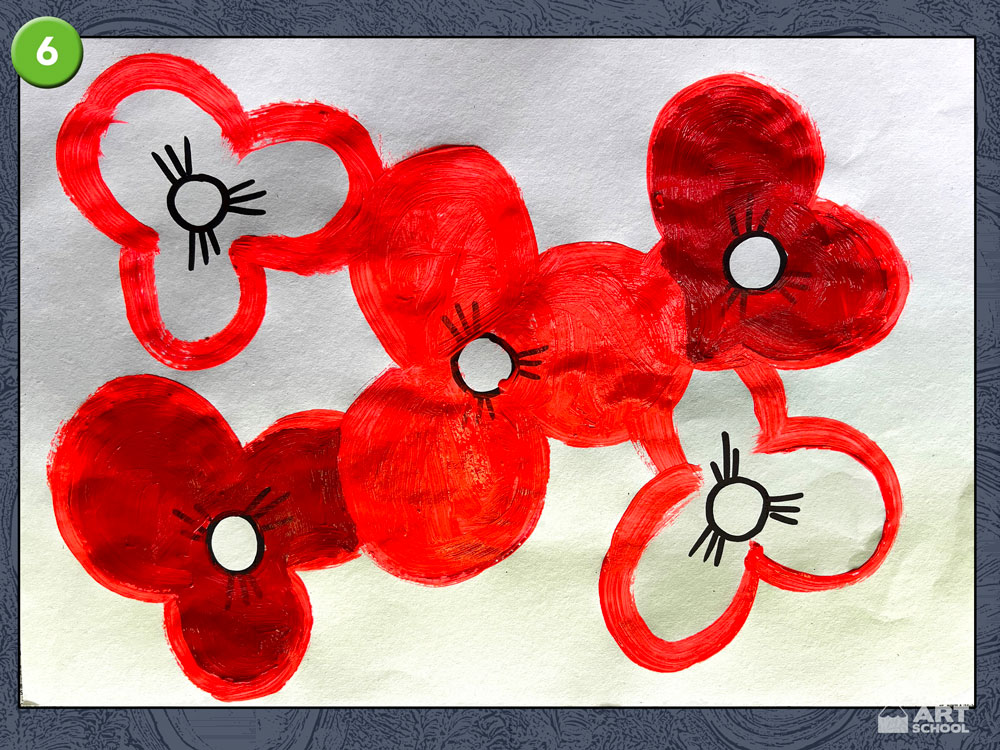
- Begin the poppies by painting the outline of the petals. Using your lightest red, paint three large petals from each black circle. Make sure the petals are huge and that you don’t leave any gaps on the black circle between the petals. Try to make sure that your flowers touch or overlap. This will help to fill the space.
- Using your lightest red, paint the whole of the poppy in the centre of the page.
- Now using your medium red, paint two of the poppies that are diagonally opposite. Notice how we don’t paint over the petals from the first poppy but trace around it. This helps to create the illusion of space and that some of the poppies are closer than others.
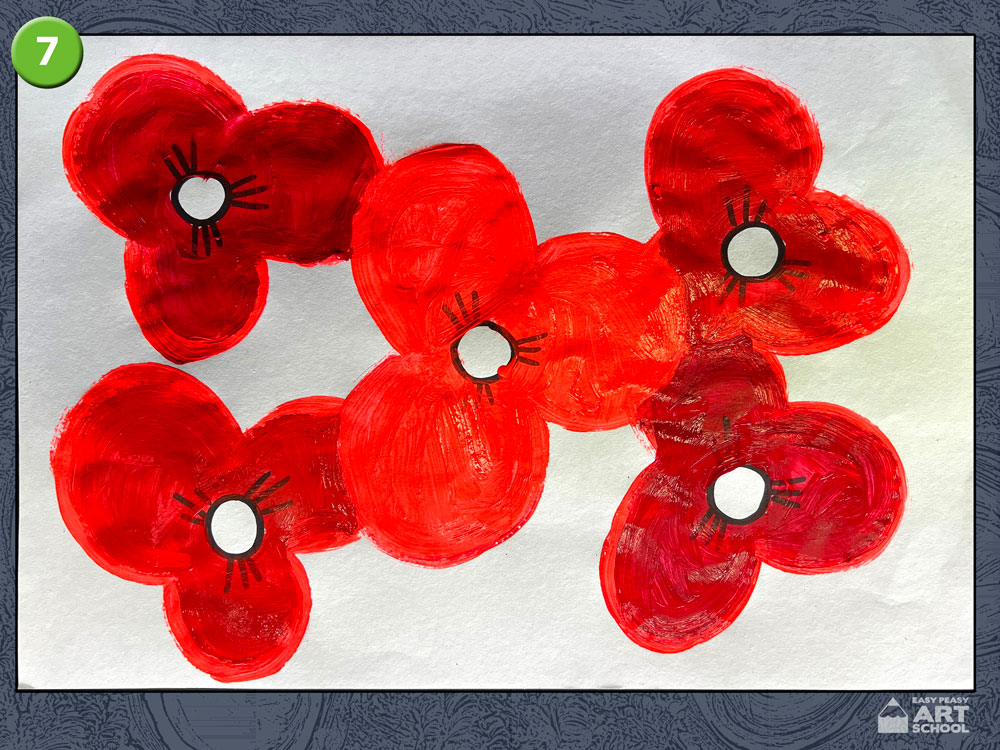
- Now using your darkest red, paint the remaining two poppies.
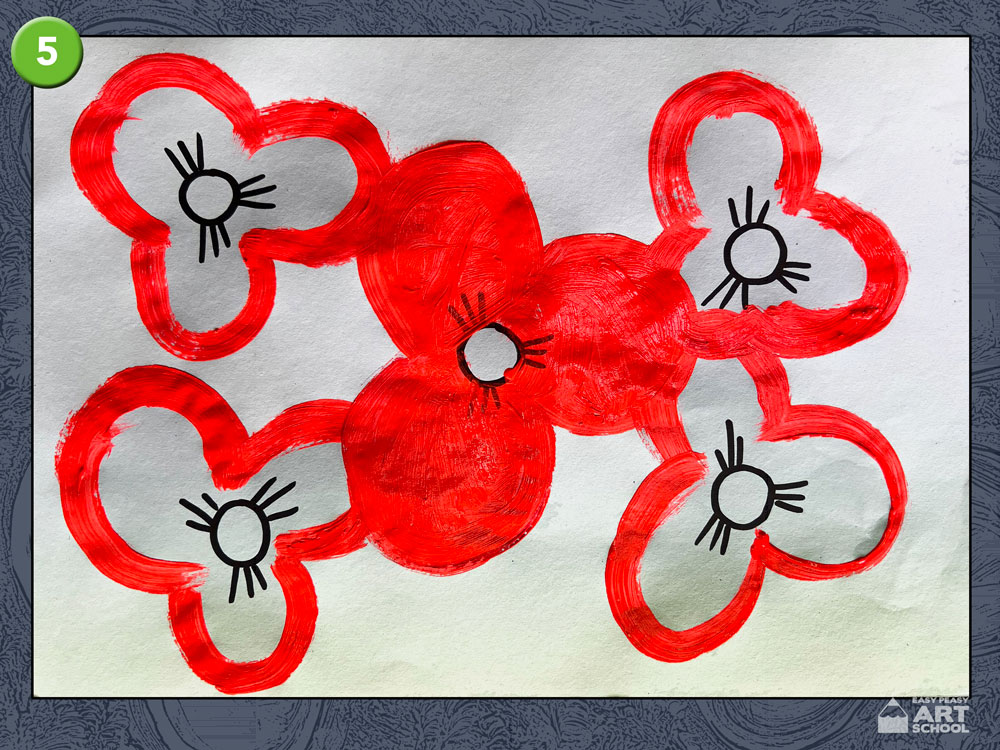
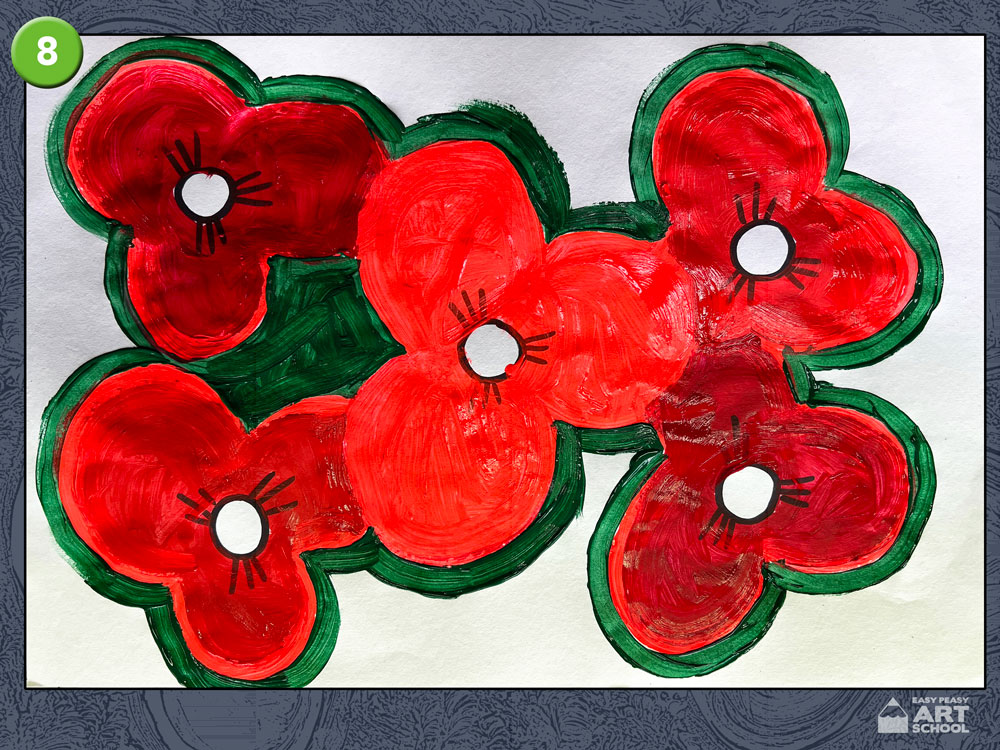
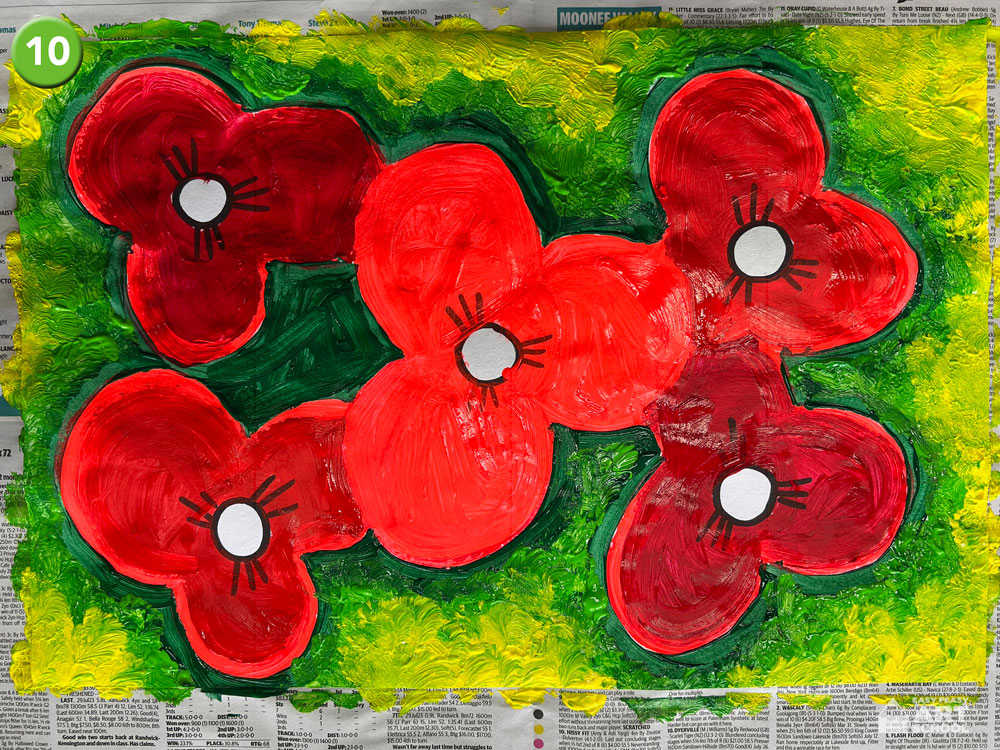
- Background: Once you have cleaned your brush, paint around the outside of the poppies in dark green. Try to use long neat strokes to keep the edge of the poppies tidy. Also paint any gaps between the poppies in dark green.
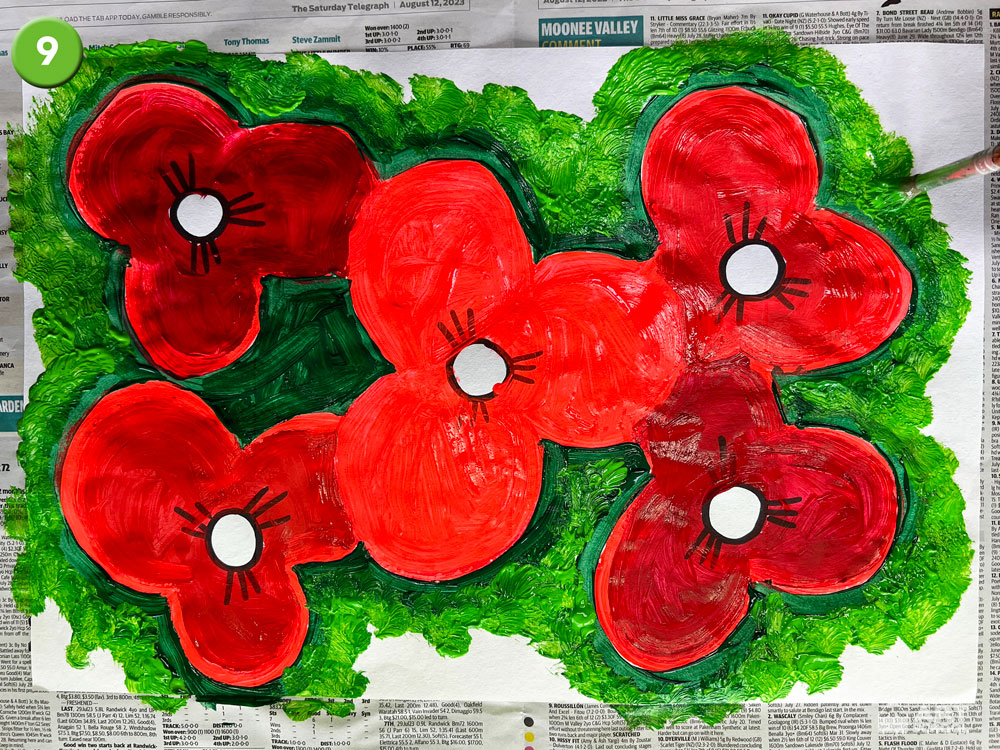
- Using light green, begin dabbing over the dark green to create texture. Don’t forget to leave some space for yellow.
- Complete the background by dabbing any remaining space with yellow.
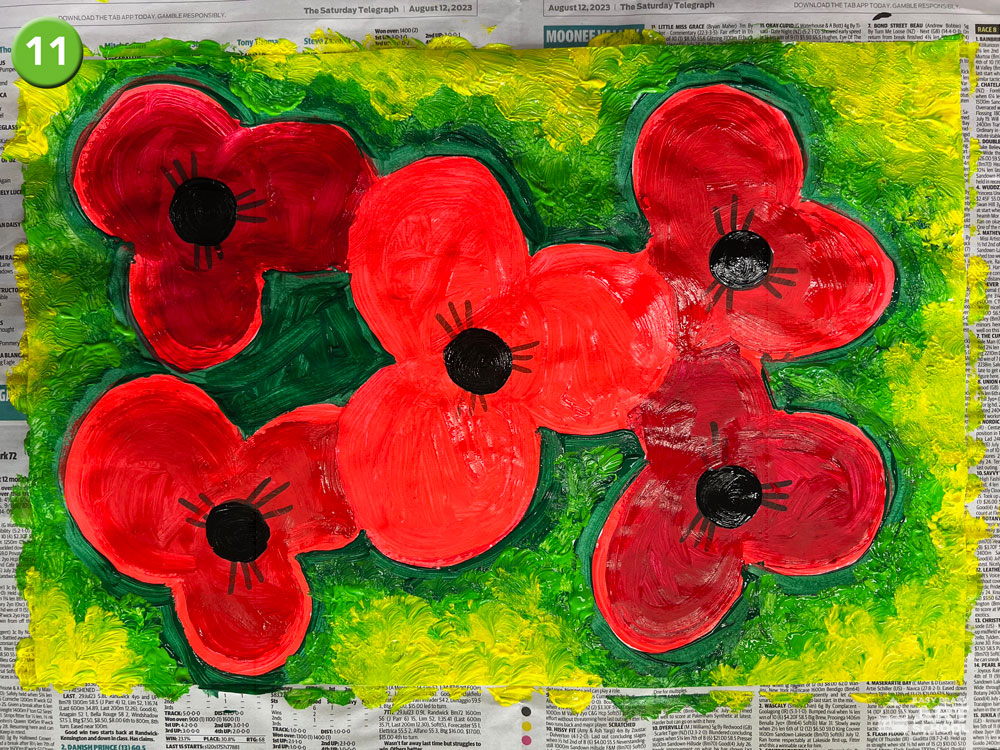
- Clean your brush then paint over the circles with black paint.
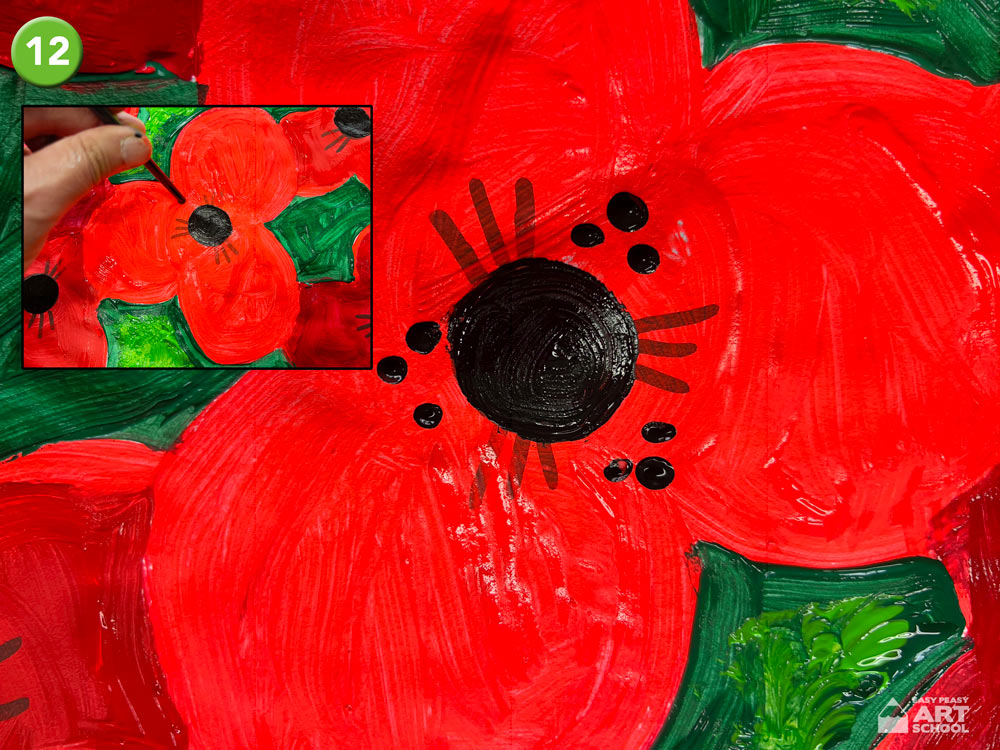
- Using the handle end of the brush, dot paint three groups of three dots between the lines as shown.
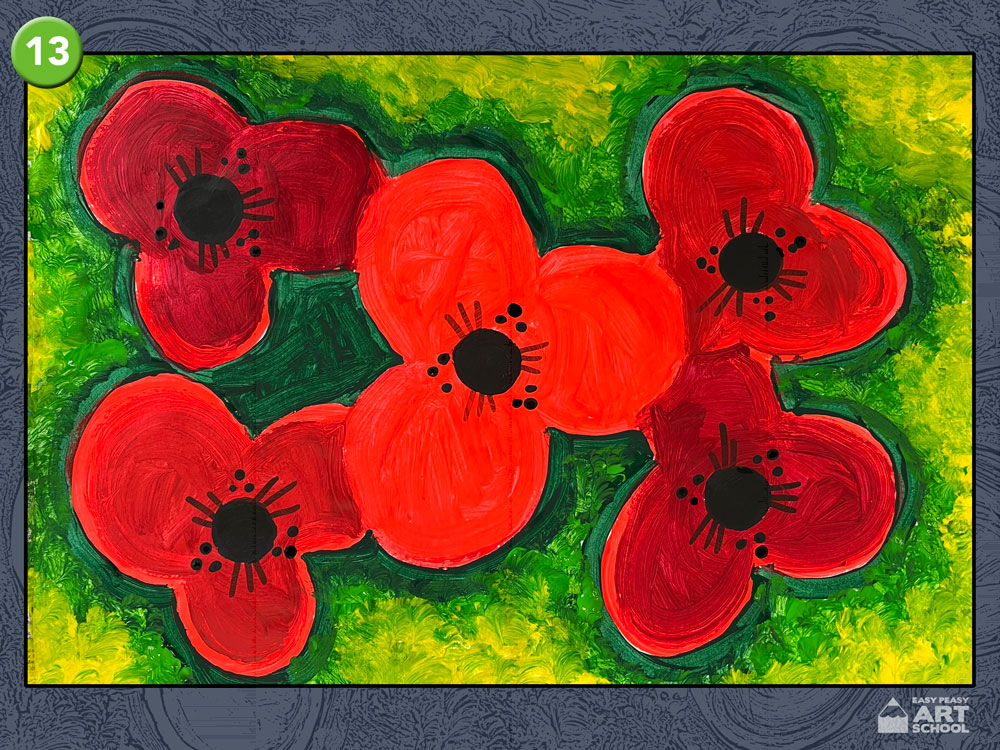
- Your poppy painting is now complete.
What do you like about your artwork? What would you do differently next time?
Other ideas:
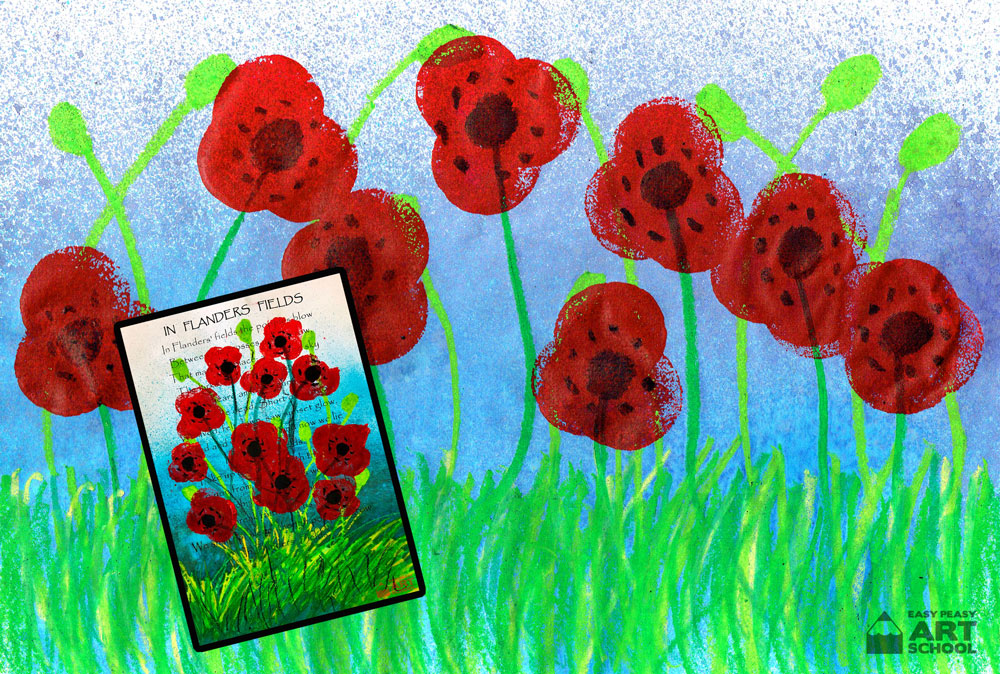
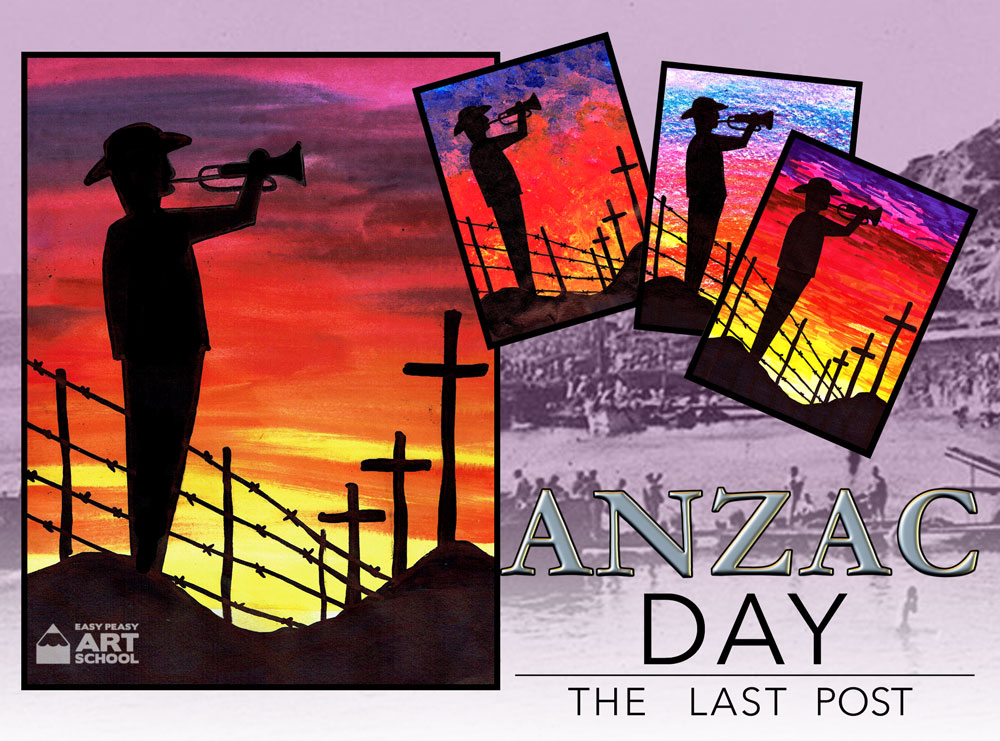
- If you would like to commemorate ANZAZ Day or Remembrance Day with another artwork check out the lessons below.